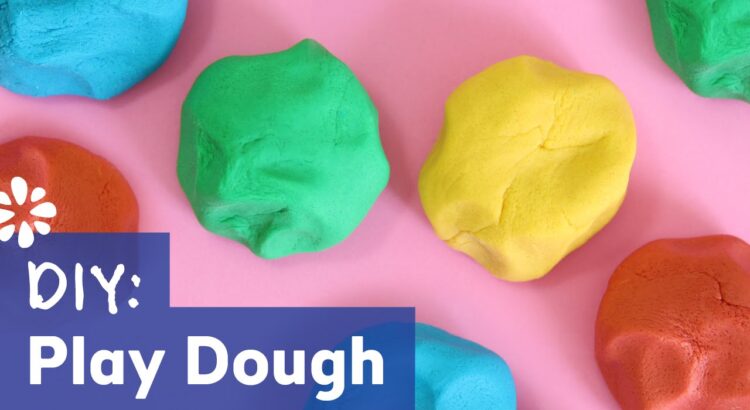
How to Make Playdough
Play Dough is a nice, quiet toy. It’s cheap, easy to make, and entertains children again and again. It’s also educational! It helps young children develop fine motor control (necessary for holding a pencil in school), eye-hand coordination, and stimulates the brain. Your child can let off some steam as he punches and pokes it. It can provide a science experience if you talk with him while you make it. Ask him how it looked before and after you cooked it. It provides sensory experiences – as he smells it, touches it, sniffs it, and tastes it.
I like the purchased play-doh just fine! It was originally created as a wallpaper cleaner in the 1930s. It wasn’t marketed as a children’s toy until the mid-1950s, and the recipe for it is still a secret. It is labeled non-toxic, yet it does contain a petroleum additive and borax, to prevent mold – and neither of those ingredients is non-toxic. It’s probably harmless enough in small doses, and children do eventually learn not to eat it. I like to keep a container of purchased play-doh in my purse. It’s just great for those moments when you need to calm a whiny child. My favorite time to whip it out is when we’re waiting for food at a restaurant. My granddaughter plays with it with the restaurant silverware, and she’s happy until dessert!
Here’s a great recipe for making play dough at home. It’s cheaper than purchased play dough and is a little softer to manage for younger hands. You can also make it in large quantities, or in a variety of colors. You can substitute different flavorings for vanilla. I like almond flavoring with brown coloring or banana flavoring with yellow. The flavorings will encourage your child to taste it, but it isn’t harmful in small amounts. There’s too much salt to let him gobble it down. But creating it with an interesting scent and taste is a good sensory experience for the young child.
Cooked Play Dough
- 2 cup flour
- 1 cup salt
- 2 tsp. Cream of Tartar
- 2 cup water
- 1 TBSP vanilla
- 2 TBSP vegetable oil
- food coloring
Mix flour, salt, and cream of tartar in a small pot. Add water and oil, stir well, then cook while stirring over medium heat until it is the consistency of thick mashed potatoes. Remove from heat. Stir in vanilla, and food coloring. Then knead on a lightly floured counter until smooth. Children can play with it as soon as it is cool enough for them to touch. Store in an air-tight container or bag.
You can use unsweetened Kool-aide to color the play dough, and then you might skip the vanilla as well. Cherry Kool-Aide works great. The cream of tartar is the most expensive ingredient, but it is the preservative. If you skip it, the play dough will be gooey in a day or two. Try to find it at a warehouse store (Like Sam’s Club) or online, where you can get a larger container at a better price.
Salt Free Play Dough
We can have so much fun with play dough. but recently we have been discussing the vast benefits of play dough. During that discussion, we talked about being wary of using play dough with young toddlers who were still eating everything in sight. So I went hunting for a salt free play dough recipe.
The reason for my own caution is the large levels of salt in traditional homemade play dough – we have always used 1/2 a cup of salt in our own. That combined with very young children’s tendency to mouth everything would be dangerous as the levels of salt would be considered toxic. With all of that in mind, I have left play dough altogether in the past until 18 months of age.
That being said, play dough is such an awesome sensory activity. My older daughter (3) loves both making and playing with it. Now that E is 13 months old, it seemed like a shame for him to miss out entirely. After browsing Pinterest for a while for salt free play dough recipes, I basically came to the conclusion that the recipes essentially just missed out the salt.
I wanted to go one step further than what I saw and I decided to miss out the baking powder too. I wanted to keep everything as simple as possible and quite honestly, I’m not overly bothered that it will only last a few days.
- 2 cups of plain flour
- 1 tablespoon of rapeseed oil
- Water (added gradually)
- Lemon juice
- Lemon rind / mint – batch 1
- Orange rind / rosemary – batch 2
Method for salt free play dough
- Add the plain flour, rapeseed oil and a squeeze of lemon juice, then mix well. The mixture should look like breadcrumbs
- Dribble water in gradually and stir until the mixture starts to combine.
- Knead with your hands. If it is too wet, add more flour and if the mixture is too dry, add a little more water.
- Grate orange / lemon rind on top
- Chop rosemary / mint
- Mix both in well by kneading again.
As I expected, his immediate reaction was to try and eat the dough! I discouraged this as soon as he put the dough to his mouth by placing the dough back on the tray and saying, ‘No, we don’t eat it.’ In hindsight, I probably wouldn’t include the herbs and orange / lemon combination in the future, it did small pretty good and was perhaps confusing. That being said, I still think he would’ve put it in his mouth anyway as that is just the stage he’s at! If you’re reading this and are intending to try it with your 12 month old, maybe just offer the dough plain? Let me know how it goes!
Edible Play Dough
- 18 oz. jar of creamy peanut butter
- 1/2 cup honey
- 3/4 cup non-fat dry milk
Mix all ingredients together. Have the child wash hands first! Then he can play with this dough and eat it. If it is too dry, add a little more honey. If it is too sticky, add more powdered milk. You can keep this in an air-tight container, or have the child roll all of it into one-inch balls, roll the balls in shredded coconut or chopped nuts or powdered sugar, and eat! Makes a great, no-bake cookie (if your child isn’t allergic to nuts, of course).
Homemade Pumpkin Spice Play Dough
A recipe to try with your preschoolers. When it comes to Autumn, I’m really quite predictable. I love cosy jumpers, long walks and a good old pumpkin spice latte. I’ve wanted to make this play dough for some time, yet couldn’t source any pumpkin spice mix (it was rather expensive from Amazon) so I eventually googled a recipe and made my own – turns out it was pretty simple.
This recipe was sourced from Taste of Home, with slight adjustments. Just to note, you need to be super careful with nutmeg as it is a hallucinogenic – check out this article for extra information. As a result, I wouldn’t recommend this recipe for children who are likely to taste test or alternatively, just leave the nutmeg out.
- 4 tsp of ground ginger (the original recipe called for 2, but I wanted a lighter colour on mine)
- 4 tsp cinnamon
- 2 tsp of cloves
- 1/2 tsp of nutmeg
We put all of the ingredients into a pestle and mortar, then Z (3.8 years) ground it all down to mix. This was a great opportunity for her to smell the ingredients and to work on hand strength.
How to make the play dough
Once the pumpkin spice was made, we simply added it to a usual play dough recipe. This is the basic no-cook recipe we use for all of our play dough. To note, you may need additional water – just pour it in gradually so that it doesn’t get too sticky.
Once the play dough was made, it was straight down to the business of play! I set Z up with a cake pan, buttons, stampers, a roller and pipe cleaners in Autumnal themed colours, then she got busy with the activity in hand.
Why you should try this activity
Making play dough together has so many educational benefits. Here’s a few reasons why you should try it with your little ones:
- Introduction to early math: From counting cups or spoonfuls to measuring out quantities, there’s heaps your little one can learn from this practical activity.
- Hand-eye coordination: it takes focus to pour ingredients from the packet into the bowl
- Fine motor skills and hand strength: using pincer grip to hold the teaspoon and hand strength to mix the ingredients.
- Sensory exploration: making play dough engages the senses, although I should probably add that tasting is not recommended due to the salt content!
- Social emotional: this is a lovely way to spend time together. Z and I often make play dough together whilst her younger brother naps.
- Making connections to the wider world: In this instance, making a nest but play dough can really be adapted for so many small world activities!
- Listening skills: Via verbal instructions.
Great Play Dough Toys
- children’s safety scissors
- measuring cups
- spoons
- rolling pin
- cookie cutters
- muffin tin
- toy doll dishes
- Play-Doh: Fun Factory Deluxe Set
- Melissa & Doug Shape, Model and Mold
- Play-Doh Creativity Center
- Play-Doh – Chomposaurus Playset
Play Dough Care Tips
Obviously, the whole point of play dough is that it is PLAYED with but that can also mean that it goes dry and crusty easily. Here’s a few tips that should help your homemade play dough last much longer.
Ingredients – what matters most?
After spending the first half of the year not being able to get cream of tartar, I can honestly say that it makes the biggest difference in the success of the play dough. We tried using lemon or lime juice instead but it just wasn’t the same. I’ve since started ordering cream of tartar from Amazon (is that crazy?!) and it’s made the biggest difference! Without cream of tartar, the dough would get crumbly fast, but now we have lovely soft, smooth play dough again – yay!
Storage
You’ve gone to the effort of making the play dough, you need to store in correctly! We tend to wrap ours in ziplock bags (which we reuse for new batches) then we seal the dough inside a container.
Generally speaking, keeping the dough in a cool dry place will be enough to make it last for up to 4 weeks. However, in the summer we have occasionally kept the dough in the fridge to stop it from going sticky.
How to soften dry dough
If your little one has been playing for some time with the play dough then it is likely to get dry. If needed at the end of a play session, we add a drop or two of water to the dough to revive it. Works like a charm!
Alternatively, wrap the dough in a damp paper towel overnight. Even play dough deserves a pampering every now and again!
How to prevent sticky dough
When making dough, the best thing we’ve found is to knead it by hand to get all of the stickiness out. If you’re still finding the texture a little too much on the sticky side however, keep rolling into small amounts of flour until you get the right, ‘springy’ consistency.
We’ve found that dough goes sticky when its too hot so if you live in a hot climate, try storing the dough in the fridge to make it last longer. You can always get it out twenty minutes before a play session if you think it’ll be too hard for your little ones.
Supervision Required!
You need to bring your focus A-Game to this activity! Watch extremely closely and don’t let your little one eat the dough in this instance. The aim here is to introduce play dough so that they will not try to eat it in the future. As mentioned above, you could always keep the dough scentless to avoid any confusion!