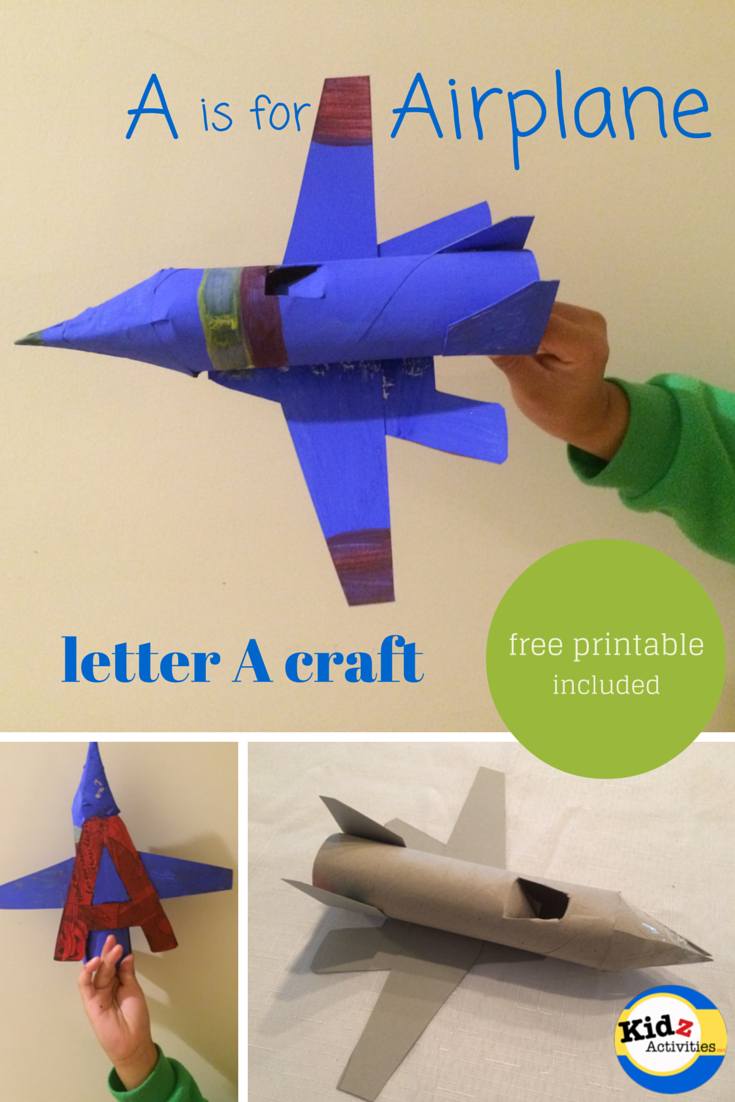
It’s alphabet learning time! Every week, we will create crafts for preschool that is related to a particular letter in the alphabet. This week, it’s the letter A! And we are creating an Airplane. Find out how we made this Amazing ‘A is for Airplane Craft’.
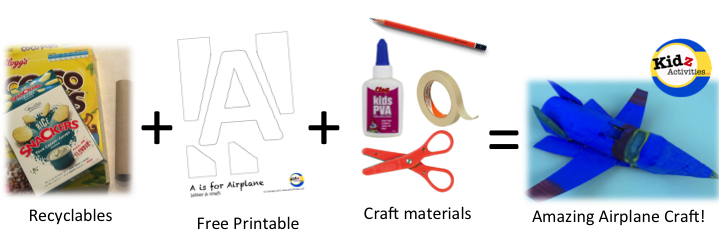
Materials needed:
- Recycled cardboard box (like a cereal or biscuit box)
- Paper towel cardboard tube
- A is for Airplane Craft – free printable template
- Scissors
- Pencil
- Kids PVA Glue
- Masking tape
- Ruler (optional)
How we made this A is for Airplane Craft:
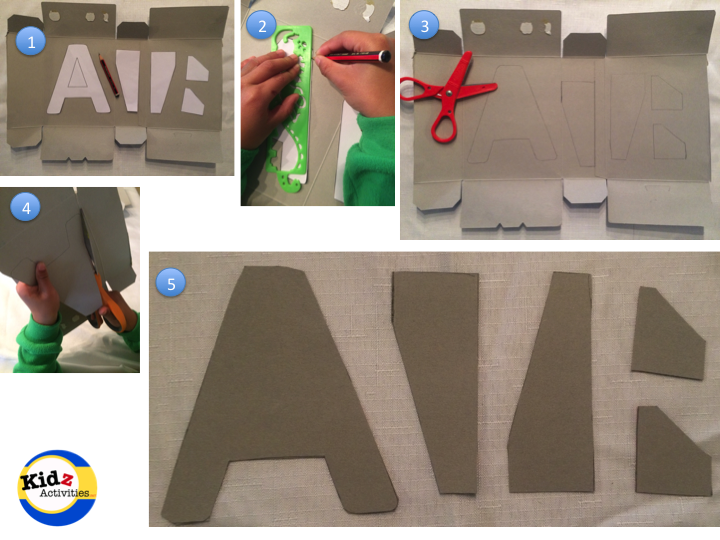
1. Print the ‘A is for Airplane Craft’ template. Cut the letter ‘A’ and 4 other pieces on the printable.

2. Open up the recycled box. And using the cut outs as a guide, trace around the cut outs. Then cut these pieces out. Young kids may need the help of an adult while cutting cardboard. When this is done, set the pieces aside first.
3. Get the paper towel cardboard tube. With a pencil, draw a line at about 1/3 of the way from the edge. And go around the circumference of the tube. This just serves as a guide to know up to where to cut for the next step.
4. Draw narrow triangles on the cardboard tube. The pointed end of the triangle needs to stop on the line you drew in step #3. Do this all around, creating a total of 4 triangles. Cut these triangles out. Then bring the 4 pointy edges together and tape it with masking tape.
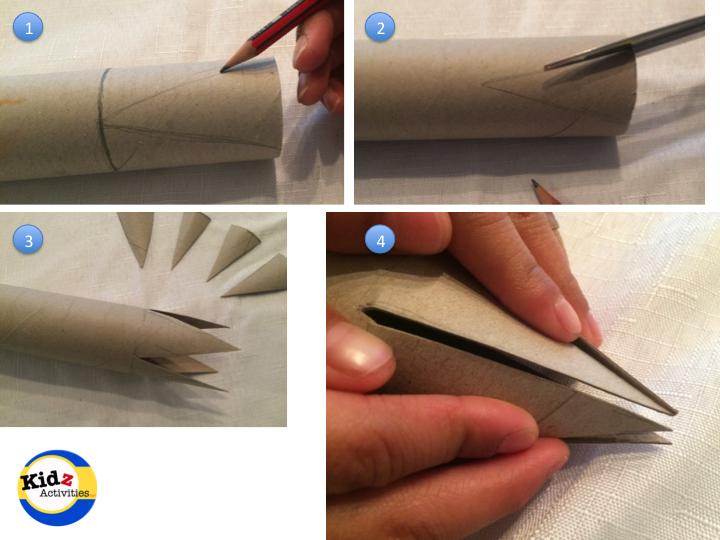
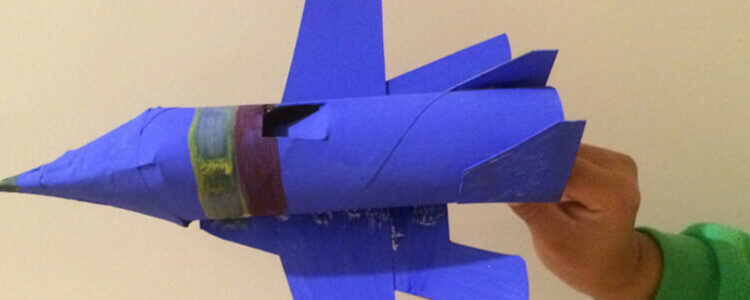
5. Optional step: Poke a hole on the cardboard tube and cut out 3 sides from this hole (2 sides and front). Push the flap down. This creates a ‘seat’ for the airplane, where your child can pop in a small favorite character to ride the airplane.
Now that all the elements are ready, it’s time to assemble the Airplane craft.
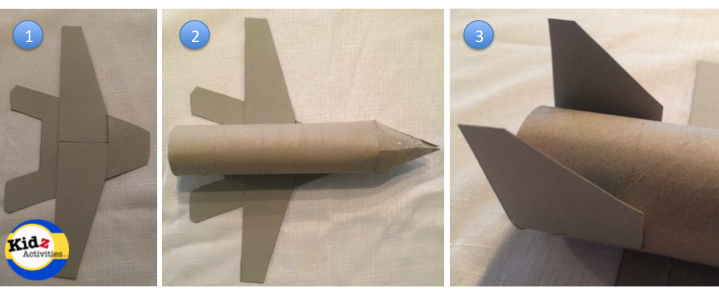
When all your cardboard pieces are ready, get the letter ‘A’ and lay it flat. Then get the 2 bigger cardboard cut outs and stick them in the middle of the letter ‘A’, as shown in the image above. This will become the airplane’s wings.
2. Stick the paper towel cardboard tube on top, making sure the pointed end is facing the top part of the letter ‘A’, as shown in the image above.
3. At the back part of the plane, glue the 2 smaller cardboard cut outs on the sides of the cardboard tube. These are the back wings of the airplane.
You can stop at this point and let your child enjoy his/her new creation.
Or you can paint it!
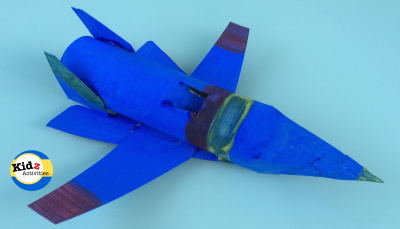
If you paint under the airplane too, try to highlight the letter ‘A’ underneath. So that when you turn the airplane over… A for Airplane!