Learning to identify common shapes is an important visual discrimination activity for young children. Shapes exist throughout a child’s environment, and an ability to readily identify shapes and to use the correct term when referring to them is important. These worksheets will help your child learn to properly draw each shape as well as gain confidence identifying the shapes.
The ability to identify different shapes is an important visual discrimination skill. Many shapes have similar appearances (such as the square and rectangle or the circle, oval, and octagon) so the ability to tell them apart requires keen observational skills. As with learning to identify different colors, knowing the name of each shape can help your child communicate clearly by labeling objects accurately. Knowing the name of each shape will also allow children to correctly understand descriptions of objects when others are discussing items based on shape.
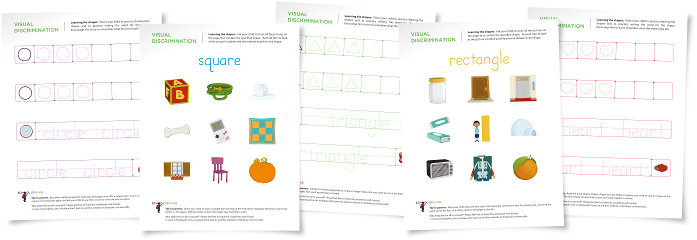
The shapes worksheets featured this week are for six of the most commonly seen (and easily identified) shapes: circle, square, triangle, rectangle, oval, and heart. Next week, once your child is familiar with drawing and identifying shapes, I’ll post worksheets for more shapes which are generally more challenging to identify and draw: star, diamond, trapezoid, pentagon, hexagon, and octagon.
There are two shapes worksheets to help introduce your child to each shape: one worksheet that gives your child practice drawing the shape and writing the word for the shape and a second worksheet that gives your child practice identifying the shape. As you introduce each shape to your child, begin with the worksheet that gives your child practice tracing the shape and writing the name of the shape. With practice, your child will become adept at these important activities which require strong visual discrimination skills as well as strong fine motor skills since pencil control is critical when drawing shapes with defined features.
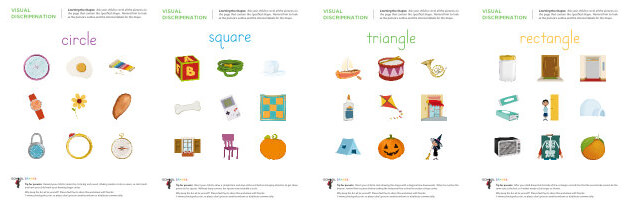
When your child is familiar with the form of each shape, introduce the second worksheet that asks your child to identify those pictures on the page that contain the featured shape. This will give him important practice recognizing the featured shape and it will also introduce him to the idea that shapes can appear naturally in his home and in the environment.
You can help your child extend this learning by showing him pictures of items with different shapes. For example, a ball, the full moon, a wall clock, and the lid to a jar are all circles. A game board, card table, napkin, and window are all examples of a square. Books, sheets of construction paper, and cereal boxes are rectangles. Challenge your child to walk through your house, calling out different shapes as he sees them.
The importance of knowing the shapes
Shapes are defining features of many objects all around us. Look around your house or notice objects when you are riding in the car, shopping or taking a walk and discuss the shapes you see. It’s especially fun and challenging to look for shapes in nature and the environment – a round nut is in the shape of a circle, the trunk of a tall, narrow tree could be a rectangle, the sidewalk is made of squares, and so on. When you and your child take the time to really look around, it is amazing the shapes you’ll find.
How shapes worksheets can help children learn shapes
Children will be able to learn the shape design and name by using two senses – their sense of sight as they look at the shape and their sense of touch as they trace and draw the shape. These worksheets also give children the opportunity to use visual discrimination to pick a specific shape out of a group of different shapes.
Tips for using these shapes worksheets
Begin giving your child the worksheet that asks him to circle each picture that contains the featured shape. For each picture, ask your child to trace the featured shape with his finger when he spies it in a picture. Also, encourage him to say aloud the name of the featured shape each time he spies it, as this will further reinforce the shape’s name and help him remember both the word for the shape and the shape’s appearance.
When working on the shape tracing worksheets, ask your child to trace the outline of the shape with the pointer finger of his dominant hand before attempting to trace it with a pencil. Tell your child the name of the shape as he traces it and ask him to repeat the name of the shape as he traces it once more. He can trace the shape with his finger a number of times until he feels comfortable with its design. Then ask him to use his pencil to trace over the dashed lines to draw the shape.
Extra tips and activities to supplement these shapes worksheets
Circle
- Remind your child to make the circle big and round. Making smaller circles is easier, so start small and have your child work up to drawing larger circles.
- Buy white reinforcements for hole-punched pages at an office supply store. Draw a large circle on a piece of construction paper and ask your child to use these circles to cover the line you drew.
Square
- Direct your child to draw a straight line and stop at the end before changing direction to get sharp points on his square. Without sharp corners, the square may resemble a circle.
- Post-It-Notes are perfect little squares to play with. Ask your child to use them to make a design on a large piece of paper and then direct him to trace around the edge of each little note.
Triangle
- Direct your child to start drawing this shape with a diagonal line downwards. When he reaches the bottom, remind him to pause before making the horizontal line so that he creates a sharp point.
- Fold Post-It-Notes diagonally to create a triangle shape. Ask your child to cut on the fold line to get two triangles from each square piece of paper.
Rectangle
- After your child draws the first side of the rectangle, remind him that the second side cannot be the same size as the first so it either needs to be longer or shorter.
- Use wooden building blocks to show your child how two square blocks next to each other create a rectangle. Ask him to separate the rectangle blocks from the square blocks.
Oval
- Direct your child to make a “skinny O” to draw an oval. Show him how an oval can be drawn standing up tall or lying down on its side.
- Reinforce the shape of the oval by taking your child to your neighborhood school and letting him ride his bike around the oval track. Explain how two sides of the oval are longer and two are shorter.
Heart
- Help your child draw a heart by telling him to draw two canes that face each other and touch at the bottom and the tip.
- Read the book Shapes, Shapes, Shapes by Tana Hoban to inspire your child to look for shapes in the environment. The heart shape can be tricky to spot, but it does appear in nature!
Star
- Find star stickers and use them give them to him for a special occasion or after he completes a worksheet. Seeing the shape frequently will help him learn the correct formation.
- Read the book A Starfish: A Shapes Book by Bernette Ford and Britta Teckentrup. Ask your child to spot the triangle shape in the colorful pictures.
Diamond
- Show your child how a diamond is made up of two triangles that touch each other along one flat edge. Cut out two small triangles and encourage him to create his own diamond.
- Cut diamonds and rectangles out of construction paper and have your child sort them into two piles based on the shape. Then label the pages with the words “diamonds” and “rectangles.”
Trapezoid
- Draw a long, straight line on a piece of paper and ask your child to draw a shorter straight line on the paper above your line. Then show your child how to connect the ends of the lines to create a trapezoid.
- Show your child how he can create a trapezoid shape by cutting diagonal edges on the opposite ends of a rectangle.
Pentagon
- Ask your child to draw a square house with a triangular roof and then count the sides on his drawing. Let him know that he has just drawn a pentagon.
- Do an online search and show your child a picture of the U.S. Pentagon. Ask him to trace the edge of the building and count the lines. Then ask him to guess the name of the building.
Hexagon
- Look at a picture of the cross-section of a bee hive with your child. Ask him to trace and count the sides of each cell and then guess the name of that shape.
- Take your child to a hardware store and investigate the shape of the nuts that screw onto bolts. Ask him to count the sides of each nut and tell you what shape the nut is.
Octagon
- Show your child how to make an octagon by carefully cutting off the corners of a square to create 4 more sides for a total of 8 sides.
- Ask your child to call out “Stop! Octagon sign!” each time he sees a stop sign as you are driving. Saying the name of the shape aloud will help him to remember it.
Additional Shapes For Added Fun
You can begin with the worksheets that ask your child to first trace over each shape and then draw each shape two additional times. This will give him important practice drawing the shape which helps solidify an understanding of each shape’s form. Before your child attempts to trace the shape with his pencil, ask him to trace over the dotted lines with the pointer finger of his dominant hand. Then ask him to trace the shape with his pencil. Once your child can comfortably identify the form of each shape, you can challenge him to complete the next set of worksheets which ask him to find the featured shape among many different shapes.
For added drawing practice at home, you can encourage your child to identify shapes he sees around your home and to trace them. For example, he can place a cup on a piece of paper and trace along the rim to create a circle. Or he can place a piece of thin white paper over the top of a book and trace the shapes that appear on the book’s cover. Using the words on the shapes worksheets as a guide, you can challenge an older child to label each shape by writing the shape’s name next to the shape he has drawn on the paper.